

How To Put In Garden Fence Posts
I am a cocky-confessed geek, beginner DIY'er, and gardener who enjoys cooking also as flight drones.
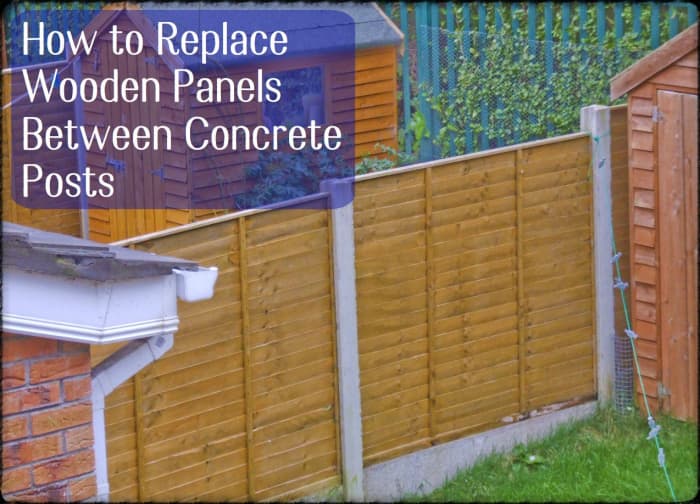
When fence panels accident out or bend, the easiest repair is to put them back in place the way they went in.
By ThrowingStick, CC, via Wikipedia
Earlier You lot Start
If your fence panel has blown out, then it's likely that it bent when it blew out. It may have swung half in, one-half out for a bit, or landed hard on the ground at an awkward angle. With all this bending and being thrown around, it'south a good thought to cheque the panel over. Look for loose nails that need hammering back in or battens that may have snapped and need repairing.
The idea is basically to put the fence console on the legs so it can be lifted into position earlier removing the legs and dropping them downward. If the fence panel is dry (it hasn't been lying on wet grass for a calendar week), it should exist pretty light, making information technology less awkward to maneuver the console into position.
We take a argue around our back garden made of concrete fence posts (which wait like they'll never motion), concrete gravel boards, and wooden fence panels. In a recent storm, seven of the fence panels in our garden were blown out. I looked and looked for some simple instructions on how to become them back in simply constitute so much conflicting advice that I couldn't make head nor tail of it all. After acquiring the proper supplies, hither are the steps I used to fix the problem:
- Reinforce your fence panel.
- Make legs.
- Clamp the legs.
- Roll information technology over.
- Lift the structure to sit vertically.
- Remove clamps and lengths of woods.
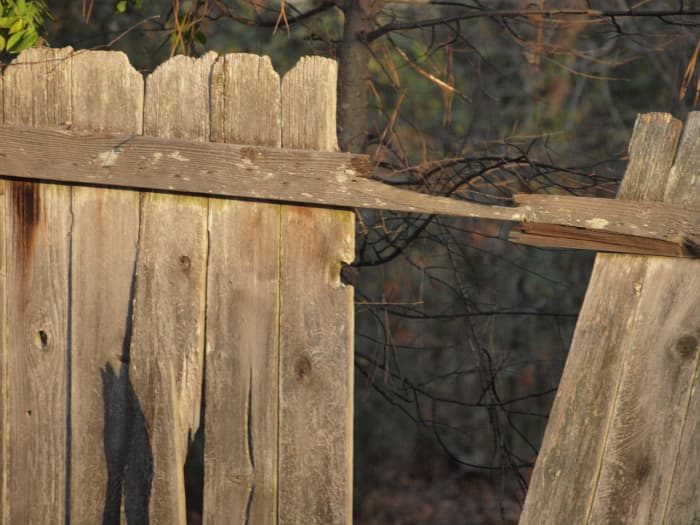
When a debate panel is blown out during a storm, information technology may bend or be thrown to the ground. Check for loose nails or battens and secure them earlier beginning the replacement.
Supplies Needed
Materials:
- 5 pieces of sturdy woods around six' long (a fleck longer is fine). 1 should be around half dozen" broad, the others just need to exist strong plenty to hold the debate panel.
- Nails
Tools:
- Claw hammer
- Clamps: I bought these clamps specifically for this job, knowing that I would be able to use them for other things afterward. I was very impressed with them. Really quick and easy to put on, tighten upwards, and take off again—all one-handed.
Difficulty:
- Piece of cake
The outset step is to reinforce your argue panel. If information technology's anything like mine, then information technology will exist pretty weak once it's been taken out from between the fence posts on either side. Lay your argue console on the basis with its "front" facing up.
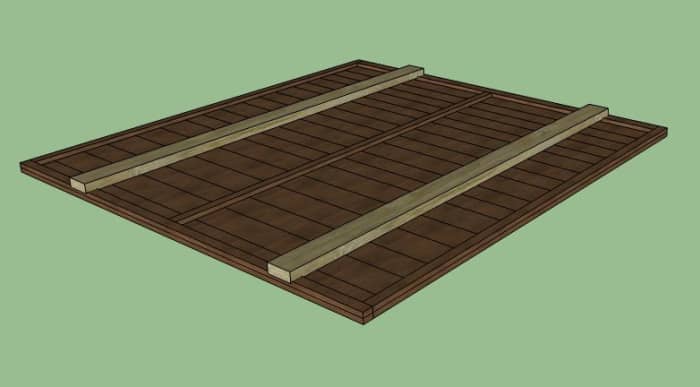
ane. Reinforce Your Fence Panel
If your argue panel is anything like mine, information technology will be pretty weak once it has been taken out from between the fence posts that support it on either side.
Lay the console on the footing with the side yous want facing your property facing upwardly. Take two of your pieces of wood and position them on superlative of the panel, running top to lesser nigh a quarter of the way in from the sides. Nail them in position. (You lot tin can use clamps instead, but I only had two clamps, so I used nails for this part).
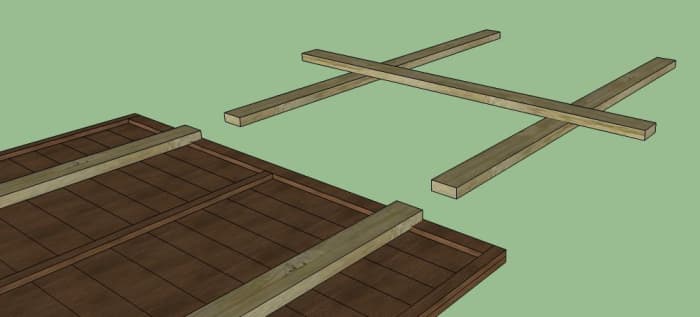
The legs for your console will cease upward being an 'H' shape that the panel volition sit on. Position ii of lengths of wood on the footing parallel to each other, the aforementioned altitude apart equally the two that are nailed in place.
2. Brand Legs
Now yous want to brand some legs for your panel. These will class an H shape, and the panel will sit down on elevation.
Position 2 of your other lengths of wood on the ground parallel to each other, the same altitude apart every bit the ii that are nailed to the console. Position your six"-wide length across these two and nail into position. Use at least 2 nails that are positioned a distance apart at each join. This prevents the woods from twists and makes a more than rigid structure.
Scroll to Proceed
Read More From Dengarden
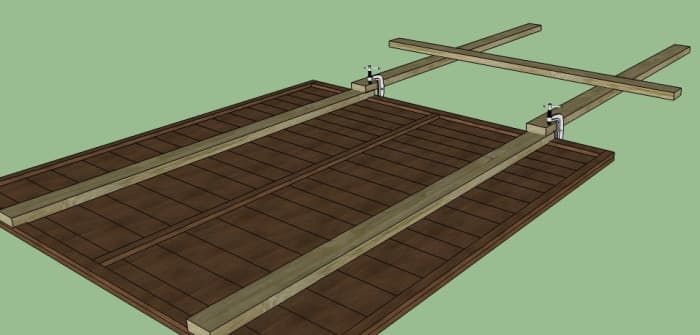
Now clench the "H" shaped legs to the bottom of the lengths of wood you nailed to the panel. Remember that the side facing up is the side that volition exist facing you lot, and then be sure the clamps are piece of cake to remove.
iii. Clamp the Legs
Now clench the H-shaped legs to the bottom of the wood lengths you nailed to the panel. Recall, the side facing up is the side facing you one time the panel is back in place. Brand sure the clamps will be easy to remove from that side.
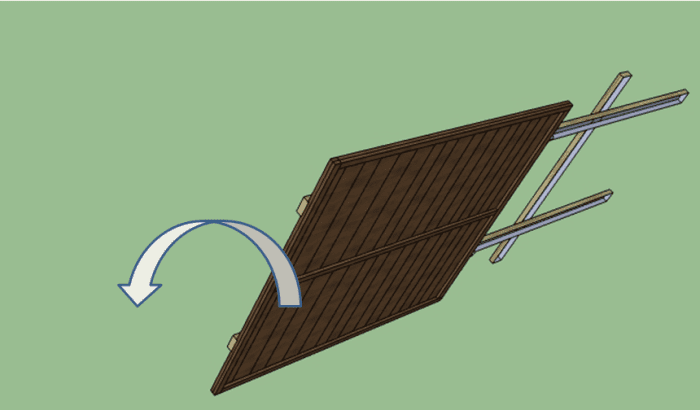
Curl the whole structure over and position the bottom of the legs at the bottom of the empty gap where y'all want your fence panel to terminate up.
iv. Roll it Over
Roll the whole structure over and position the bottom of the legs at the bottom of the empty gap where y'all desire your fence panel to cease upwards.
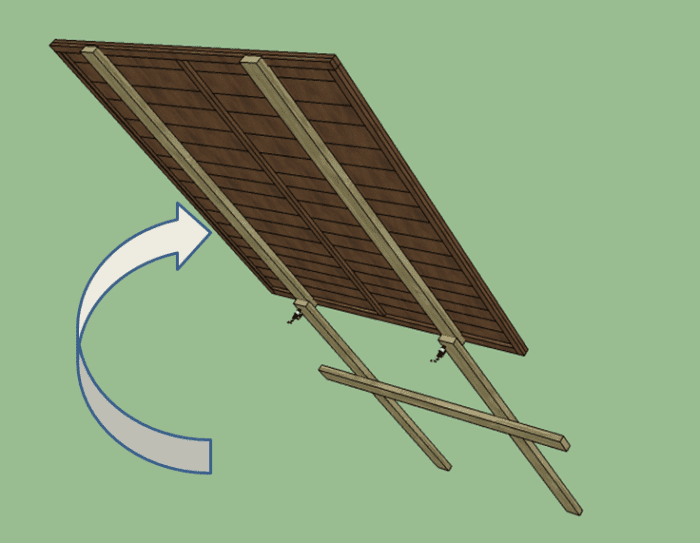
Lift the pinnacle of the contend panel up over your head and walk forward, lifting the whole structure into a vertical position.
v. Lift the Structure to Sit Vertically
Lift the top of the console over your head and walk forward, lifting the whole structure into a vertical position. One time it's fully vertical, you should accept a debate console that'due south effectually 12' in the air, with the bottom positioned just beneath the top of the posts. You may be able to motion the top of the posts enough but to push the bottom of the panel between them (the posts volition have far more than motion at the peak than they do at the bottom), or you may demand to lift it the last few inches to slot it into position.
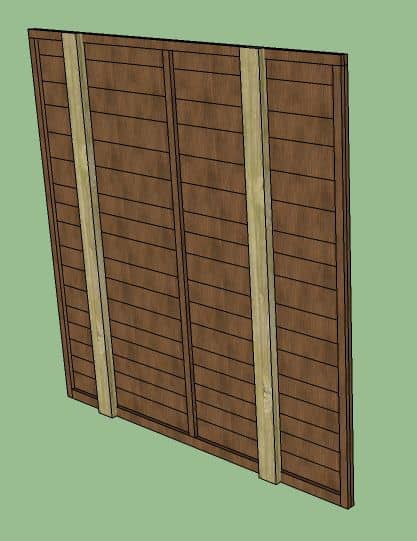
Once y'all've got the bottom of the console neatly in betwixt the posts, but remove the clamps that are holding the legs on and drop the panel into position. Remove the 2 lengths of wood that you lot nailed on in pace 1, and you lot're done!
6. Remove Clamps and Lengths of Wood
In one case you lot've got the bottom of the panel neatly in between the posts, merely remove the clamps that are holding the legs on and drop the console into position. Remove the two lengths of wood that y'all nailed on in pace one, and you're washed!
Best-Case Scenario
If y'all're lucky and follow these steps correctly, you'll exist able to get your fence panels back in pretty much the same way they came out. The all-time-instance scenario is when you can lift the fence panel upwardly, fit one edge in the groove in the mail, and bend the lesser of the panel just plenty so you tin can push the other edge between the posts. In one case the bottom is in, so, with a mixture of fauna forcefulness and gentle persuasion, you should exist able to work your fashion upwards the panel pushing the balance in.
Our fence is a few years erstwhile now, and the panels accept started to warp, specially along the bottom edge. This is one reason they blew out so easily. I stood my panels on blocks simply high enough to lift the lesser edge higher than the gravel boards. This way, I could residual the panel with ane border, held in the slot in the concrete post, whilst angle the bottom edge to become the other side in.
This technique works best when the panels are wet and then that the wood is more than likely to bend rather than snap. Not likewise wet, though, considering the wetter they are, the heavier they'll exist!
This article is accurate and true to the all-time of the writer'south knowledge. Content is for informational or entertainment purposes only and does not substitute for personal counsel or professional person advice in business, financial, legal, or technical matters.
© 2022 phuefi
Have you plant an piece of cake manner to supercede fence panels?
Rip on October 01, 2022:
Hi Simply wanted to say I tried this technique today and information technology worked thanks for the tip.
Kath on August xvi, 2022:
I'm so pleased I constitute these posts. I'm in my sixties and was widowed recently so like Keith I'yard having to think outside the box in order to become jobs like this done on my ain (I was very proud of myself when I worked out a way to go the roof box on my car unmarried-handed). Many thanks Phuefi and Keith - I'll be sure to effort out your methods when I replace the numerous missing fence panels and posts in my garden!
Keith on May 03, 2022:
Practiced idea, but I've constitute a way of doing it on my own (and I'm nearly 80!!)
I clamped (using 2 x G cramps) a decking lath horizontally most the top of the posts . In the middle of this I clamped a vertical "ships mast" almost 14' high that had a cloths line pulley stock-still to the top and a hand winch screwed about 3 ' up from the bottom. I put webbing slings around the fence panels - one at each finish and placed them round a hook on the end of the rope that I had wound effectually the pulley at the top. Wind upwardly the winch and up came the one-time argue panel - and then lowered to the ground and replaced by the new fence console. Winch up the new contend paned - marshal the lesser with the grooves on the posts then lower it into the grooves. Pretty unproblematic. I feel like I've invented the cycle... sailors were doing similar things on sailing ships years ago! AND, it didn't cost me a penny every bit I had all the bits and pieces around the garage and garden. It'south amazing how inventive you lot take to be when you're on your own without the help of a pile of husky builders!
queenofbeauty on March 26, 2022:
Totally awesome!
phuefi (author) on March 22, 2022:
@takkhisa: Glad you similar it, I promise it's useful!
Takkhis on March 21, 2022:
Great lens! Yous are very brilliant and you have shared an excellent tutorial with usa. Thanks for doing that.

How To Put In Garden Fence Posts,
Source: https://dengarden.com/landscaping/how-to-replace-a-fence-panel-with-concrete-posts
Posted by: rangelwillith.blogspot.com
0 Response to "How To Put In Garden Fence Posts"
Post a Comment